Looking for new hiking boots? When I first started getting into hiking, I was told to buy my hiking boots a size bigger than regular shoes. I thought that seemed strange, but when you think about the science of feet, it makes perfect sense.
By nature, your feet swell up at the end of the day. No matter your age, no matter your health. It’s just how feet go. If you have a job that requires you to stand all day, you no doubt know this first-hand. Even if not, you might be relieved to kick off your shoes at the end of the day but not really know why.
This is why. Because your feet swell! And the more you engage them, the more they will swell. So, when it comes to buying hiking boots, should you buy them a size bigger? Yes!
How much bigger depends and I’ll get into that further down, but generally, it should be about half a size or even a full size bigger. You want a snug fit, of course but not so snug that it feels like you’re wearing boa constrictors on your feet. You don’t want it tight though, because you need room for moving your toes. And you have to take socks into consideration as well because they’ll be consuming a bit of real estate within each boot.
Trying them on at the end of the day when your feet naturally swell along with the kinds of socks you’ll wear while hiking will give you the best fit of all. But let’s not get ahead of ourselves, ok? Keep reading, and I’ll go through everything you need to know about buying your hiking boots and what you should look for!
How do you find the right hiking boots for you?
When it comes to shoes, you have to try them on. Especially hiking boots. But you shouldn’t buy them then and there. You’re going to find better prices online. It helps though, especially when you’ve never owned a pair of hiking boots, to go stick your feet in some of them and get a feel for the styles.
There are many styles too. Some are best for longer hikes, others are best to help support heavier loads, some are suited to one terrain type over another, and some are better at helping support your feet should you be working through an injury in your legs or feet.
You’ll find ultralight trail shoes and mountaineering boots and everything in between. You’ll also see things like uppers and lowers, outsoles and midsoles. It’s enough to make your head spin, which is why I’m here to help you navigate those choices for your perfect fit. And speaking of the perfect fit, my guide will help you get that perfect fit for you. My feet are different than yours and that of your hiking partners. Just because they love one brand and swear by it doesn’t mean it’s going to match you.
So let’s get down to it and explore the types of hiking boots that you’ll need to choose from!
Types of Hiking Boots
Now, as for which type of hiking boots you should buy, you’ll need to think about how you’re using them. Here’s a quick rundown of what you’ll find:
- Hiking shoes – These are low cut and have flexible midsoles, ideal for a day hike.
- Day hiking boots – You’ll find them in mid to high cuts and want to use them for day hikes or those short backpacking trips when you’re not carrying heavy loads. They are more flexible and don’t need you to break them in too long. These aren’t ideal for heavier loads though, because they don’t give you enough support.
- Backpacking boots – You’ll want these if you’re going to carry heavier loads on taxing multi-day trips in rugged terrain. These usually have high cuts and wrap around above the ankles to give you more support. The midsoles are stiffer too, allowing for more durability.
Wondering what all this midsole and upper talk is about? Let’s get into the parts of your shoes and the materials you’ll find them in so you can make your best choice.
Hiking Boot Components
It’s not enough to just decide on hiking boot type for your new hiking boots. You need to know what the components of your chosen boot will do to help you out on your adventures.
– Hiking Boot Uppers
Let’s start with the uppers. The materials you’ll find here are what impacts the weight of your boots, how breathable it is, the durability, and whether or not it can weather the storm through water resistance.
- Full-grain leather – You’ll get the most durability and resistance to abrasion here. It’s also good for water resistance. This material is used most often in backpacking boots, ideal for extended trips, and carrying heavy loads over rough terrain. It lacks breathability compared to nylon/split-grain leather uppers, and you’ll need to break them in for a bit before you take them out on a long adventure.
- Split-grain leather – This upper material is usually matched with nylon or nylon mesh, which makes it lightweight and breathable. It splits away that rougher part making it lower cost, but it is less water-resistant and may cause abrasion.
- Nubuck leather – This full-grain leather is buffed out, so it looks like suede. It lasts and lasts while resisting water and won’t cause abrasions. Since it’s fairly flexible, it’s a great choice, but it also needs time to break in before a long hike.
- Synthetics – Things like nylon, polyester, and that synthetic leather are also available. They’re lighter than leather and can be broken in more quickly. They dry faster too, and tend to have a lower price tag. Unfortunately, they may wear sooner, which would require replacing them more often than other hiking boot materials.
- Waterproof membranes – When you see shoes and boots that have waterproof features, they usually have a breathable and waterproof membrane to help keep your feet dry even in soggy conditions. Of course, this means the breathability is reduced and you’ll have sweatier feet.
- Vegan – As the name suggests, there are no animal ingredients or byproducts used in the making of vegan hiking boots.
- Insulation – You will want insulated boots for mountaineering when you are hiking in cold and snowy climates.
– Hiking Boot Midsoles
When it comes to the midsoles, this is the part of your shoe that cushions your feet and safeguards them from the shock of impact with the ground. They are also what creates stiffness in your hiking boots. On a regular day, you might not want stiff boots, but for long hikes, especially on rugged and uneven terrain, you get more stability and comfort. It guards your feet from roots and rocks and lets you keep going.
Usually, these are made from ethylene-vinyl acetate known as EVA and polyurethane. EVA is lighter, less expensive, and cushier. The densities vary to provide more firmness in certain areas, like around the forefoot. Then with polyurethane, it’s firmer and more durable, which is why you find this material in mountaineering boots as well as extended backpacking versions.
– Hiking Boot Internal Support
Again, hiking boots aren’t like a pair of street sneakers, which you might just snap up because they look cool. And if you do, you might not get that internal support you need. Internal support is critical for hiking boots because it literally could make or break you.
Inside the internal workings of your hiking boots, you have shanks, which are inserts about 3 to 5mm thick shoved between the midsole and outsole. These provide load-bearing stiffness for the midsole and range in length. They can cover the entire midsole or half of it, depending on the design.
There are plates too, which are thin and slightly flexible, found between your midsole and outsole, below the shank. The plates serve to keep your feet from bruising by way of uneven terrain or rocks.
– Hiking Boot Outsoles
Now for those outsoles. All these hiking boots have rubber on the outsoles though sometimes things like carbon are added to make the hardness stronger and more durable. This is what you want for backpacking and mountaineering boots, but if you go off-trail, it can feel like you’re sliding.
The lug pattern is something to think of here for it provides traction. The deeper and thicker they are, the better your grip. You want them widely-spaced to give you that traction and make it easy to shake off mud.
Then there’s a part of the outsole you likely know by the sight of it, but if I told you what it was called, you’d be confused. It’s the distinct heal zone that you’ll see separated from the arch and forefoot, which is there to keep you from sliding on steep descents. The name for this portion is called the ‘heel brake,’ an apt name if I do say so myself.
And one more thing…
For those of you that hike in the winter, especially backpacking or mountaineering, you need boots and crampons that are compatible. If this is what you’re looking for, don’t forget about the crampons!
Hiking Boot Fit
And now that we’ve covered the ins and outs of hiking boots, it’s time to get more into the fit you should get when you’re choosing a new pair. As I mentioned earlier, they should be snug yet not tight. You should be able to wiggle your toes even with appropriate socks on.
The best time of day to try them on is the end of the day once your feet have swollen. This will give you a true to life fit that will be comfortable even after hiking for days.
Here are some more things you should know about the fit of hiking boots:
- Make sure you’ve got your size. Measure your foot length, the width, and the arch. You can pop into any shoe store to do this so you can order it online with ease. Knowing the foot volume is something that will help too though if you use sizing charts.
- Pull out your insoles. If you stand on them, you can look to see if you have a thumb width of space from the longest toe to that end of your insole. This is a good trick for anyone who has hiking boots that needs a new pair.
- Always bring your orthotics to try on hiking boots (and other shoes). You can’t order properly online if you’re not accounting for how these will impact the fit.
- Use the right socks. They should be the right thickness and material. Ideally, synthetics are best because you won’t be using cotton on the trail. Cotton takes too long to dry and will lead to blisters.
- Walk in those boots. When it comes to buying hiking boots, you should always give them a good walk about when trying them on. Find an inclined surface if you can. You don’t need to buy them there but it’s wise to get a feel for them first.
- Pay attention for bumps or seams. If you feel like the boots are pinching you in the forefoot or your toes are hitting the end, it’s not the right fit. The same goes for if you have them laced up firmly and you’ve got space on the top of your foot. These things are dead giveaways that you have an improper fit and need a different style or size.
- Consider brands you’ve worn before. You’ll be more familiar with the foot model of a brand you’ve used before.
- Think about lacing. The way you lace your hiking boots can make a difference in how they fit. Be sure you’re doing it the right way before you decide against a pair of boots.
- You can also add insoles. This is ideal for any of you that have oddly-shaped feet or keep encounter volume problems. It will add that extra bit for you and provide the comfort and support you need.
- Always break them in. Once you do decide on your pair of hiking boots, you need to break them in. Take frequent small hikes to avoid getting sore feet when you are miles and miles from home.
Tips for Buying Hiking Boots and Shoes
Let me go into a little more detail when you’re trying on hiking boots to know what to do so you get the best fit. As I mentioned, going to a store and getting measured is ideal first. This will help you determine your size so you can order the right one when you’re ready.
– Ask to be measured
Both feet should be measured, so you know which boot size is best. You’ll also be able to see if one foot is larger than the other.
– Lace them both up and test them out
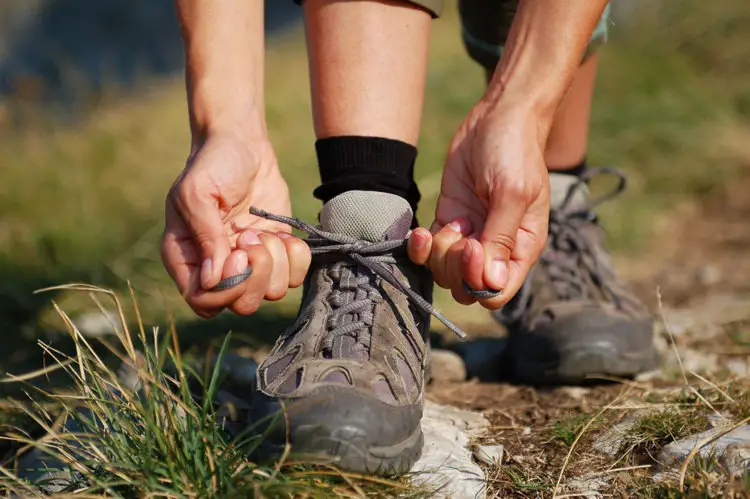
Put the boots on and lace them up. Then stand up and see if you can wiggle your toes. Those big toes should be close to the front of the shoe without touching it. If you have a thumb width of space between the big toes and that shoe front, it’s too big. Don’t forget to take socks into consideration too. This is why you should be wearing the kind of socks you plan to wear so you know the fit you’ll get.
– Rock and roll
On your toes, that is! Roll back and forth from toes to heels several times. When the boots are the right fit, your heels won’t move around inside them. Just think, the more your heels are moving around in there, the more blisters you’re going to have. Ouch!
– Walk it out
As I said, ordering online is best, but if you have no idea how your hiking boots will fit, you need to try on a few and try them out. That means putting them on and seeing how they feel. You should also walk around the store and go uphill and downhill if possible. The boots that are best and in the right size for you will stay in a secure position. If they don’t fit properly, you’ll have heels that move around and toes that bang into the front. Either change the size or change the brand entirely.
– Need for speed
Now speed things up and try to simulate rushing downhill or quick stops. Any poking, rubbing, or pinching should be noted for that’s not going to help you while you’re out on the trail.
And yes, while you will need to break in your new boots a bit, problems like those don’t just go away. When you have heavy-duty boots, they will soften slightly and conform to your foot, but from the beginning, they should fit right and feel mostly comfortable. On leather boots, the ankle cuff will soften with each use, but for lighter boots, there will be little break-in needed.
What questions should you ask during the fitting process?
Getting fitted is the first step in your buying process. It is the only way you’ll be able to buy the right hiking boots for you. You’ll need to have both feet measured and make sure they do this while you’re sitting, standing, and then take into account more than just the foot length. The arch length and width should also be taken.
As for what to ask, don’t forget to inquire about the following:
- Can you tell me about the boot construction?
- What is the upper made from?
- The insole? Midsole? Outsole?
- Does it come with a supportive insole?
How do you know how much support your feet need?
For most people, normal support should suffice. Those of you with foot troubles like regular pain or plantar fasciitis should be sure to ask your podiatrist first. Everyone else can think about the type of terrain, the weight of the load you’ll carry, your arch height, and the shoe construction itself.
You can always add an insole too, but getting the right fit on the rest of the foot will ensure surefootedness on every hike from here on out!
Conclusion
Buying your hiking boots a size bigger allows for room to move your toes and have socks on. But you can’t simply order a pair of boots a size and a half to a size bigger than your regular shoes. It requires trying them on and trying them out first. Some may be too big, even with your proper socks on. Some may pinch even when you follow the rules.
Testing them out makes it easy to determine what you’ll feel like when out on the trail. It’s an important step, pardon the pun, so get fitted to have comfortable hikes in your new hiking boots!