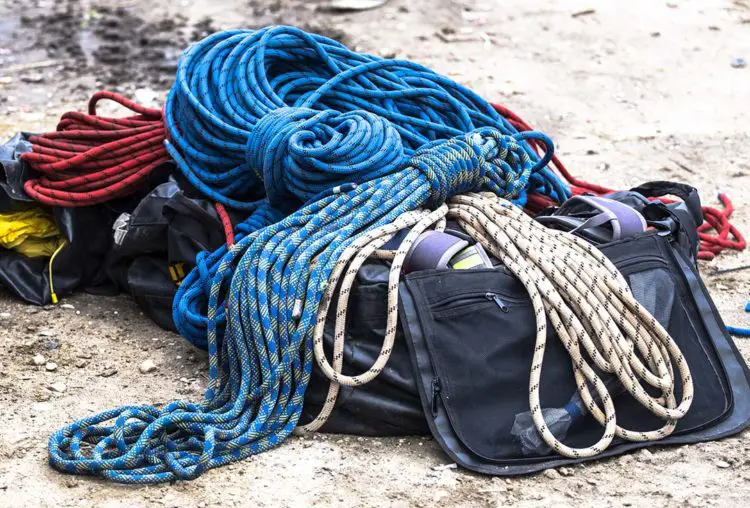
When it comes to your climbing gear, you invest a fair amount in it just to keep up with the sport. That being said, it seems only logical that you’d want to label your harnesses and ropes.
If you recall the days of summer camp where your mom wrote your name in every piece of clothing in your duffel, you might reach for a permanent marker. But do Sharpies or markers damage soft rock climbing gear?
No, they don’t. There isn’t any proof that they destroy these soft items either in the immediate sense or down the road. But there are reasons you might not want to use them on your ropes.
If not markers, then what can you use? Well, you’re in the right place. Here, we’ll get into the best ways to label your soft rock climbing gear and keep it organized while keeping you, your equipment, and the environment safe, so read on!
Labeling your harness with sharpies
At the OSG, it’s their entire focus to keep everyone healthy and safe. They contend that you shouldn’t mark your fall protection harnesses, nor should you write on them. That contrasts with other information out there that you can write on the tags with a permanent marker (like a Sharpie), but OSG sternly warns that you shouldn’t do so as it could compromise the integrity of your gear.
So, by that alone, it’s probably best to heed what the experts say when it comes to writing in marker on fall protection harnesses, especially where the webbing is concerned. OSG states that following the manufacturer’s guidelines comes first for protective equipment (for the workplace and rock climbing), and if you check out those top manufacturers, most of them do not advise that you write on any portion of these harnesses.
If you’re storing your harness at the gym and want to be certain it doesn’t get swiped though, a labeled storage hook could work, or you should keep it locked away in a locker. Some brands may have a tag that allows for writing your name on it, and if it does, then it’s perfectly fine to use a Sharpie to label it with your name.
So, ok, no writing in the harnesses then. But what about the ropes? We’ll show you the ropes on that below, so keep reading.
Marking the Middle of a Rope with Sharpies
Now, according to the UIAA in regards to climbing ropes, they have some important words for you about using a Sharpie or permanent marker brand to mark up your rope. Essentially, it’s not a great idea.
The reason is due to testing that its Safety Commission performed. On some ropes, marking them with the kind of liquid that comes from these permanent markers can damage them. This was even the case for markers designed with the sole purpose of making markings on ropes. You can roll your eyes, or you can look at the data, which revealed that marking the ropes decreased the rope strength by as much as 50%. That means it had less energy absorption capacity. While this might not make a difference to you if you’re only using a particular rope to tie up a bundle of sticks, it most certainly has your attention if you plan on using it to keep you safe while climbing.
For this reason, the UIAA strongly advises that you do not use these kinds of things to mark your ropes. It suggests you seek out what the rope manufacturer has approved for safe marking.
While the testing was done in the extreme of conditions and not real-world scenarios, it’s still important to err on the side of caution. You don’t really want to fall trying to prove them wrong over a marker, do you? Didn’t think so.
Engineers have tested it out though in lab settings and have found that imposing a violent and high-impact fall on the rope repeatedly on the middle mark leads to breaking though that’s not very plausible in actuality. In other words, it takes a lot to break it though you can see why these safety institutions do put out these advisories. If one person freakishly falls due to a rope break where a permanent marker was used, it would be their hides if they hadn’t warned of it.
Let’s now move on from attempting to defy safety standards and instead find out what causes big-time damage to your soft climbing gear plus ways to mark that gear that will give you peace of mind.
What damages soft rock climbing gear?
While the OSG and UIAA certainly don’t have a vendetta against Sharpies and other permanent marker brands, the warnings are important for keeping you safe while climbing. There are other things you should be concerned about though with your soft rock climbing gear, so take a look.
– Contamination via chemicals
Where do you store your soft climbing gear? If it’s near any acidic chemicals or bleach, you’d better change your ways. Chemicals like these can do severe damage to a rope even if you can’t see that damage. Out in the garage, bundled by the washer and dryer where you also keep the bleach is one of the worst things for it. Obviously, if you see bleach spots or staining on that rope, you’d better get a new one and find a better place to stow it safely.
– Visible cut or damage to the sheath
Take a look at your ropes and if you see the core or it has a cut on it, it’s time to toss it. Never use a rope if even one yarn of the sheath is cut. You may even see a single filament of the yarn that is damaged or looks fuzzy, which isn’t an immediate danger. In some cases, you can cut that rope (read the post here) to repurpose it but depending on where that damage is; it might not be possible.
The key here is if you can see the core. If you can, then get a new rope before you go climbing again.
– Your sheath is fuzzy to the extreme
So, let’s sat your sheath has a little fuzz on it. That’s fine, just a little wear and tear. But if it looks really fuzzy, you’ll have to put that rope out of commission.
– Slipping sheath
Sometimes when you’ve put your rope to good use, you’ll notice the sheath has a bunched up look to it. This is definitely not a good scenario for if you feel along it, you’ll find that there is no core in certain spots. Again, problems with the core of your rope mean you need to bid it adieu.
– It feels like a sponge
When you’re getting into climbing, it is essential to always check out your gear prior to each climb. Take the time to feel your ropes for sponginess, which is a sign of core damage. You’ll usually see this at the ends of the rope, which means you can use the trick of cutting it to shorten it and rid yourself of those spongey sections. Again, you’ll find the post on how to do that here.
– It just looks deformed
Maybe you haven’t been into rock climbing all that long, but it doesn’t take a genius to spot deformations in your ropes. Look for big bulges, nicks (especially those that expose the core or have cut yarn), or inconsistencies in the stiffness. It might be disappointing to have to go replace a rope right away, but it’s better than suffering an injury (or worse!) should that rope fail you.
– It’s been through the extremes
Let’s say you took a whipper on a fall higher than a 1. That’s a pretty strong hit to the rope and compromises its effectiveness at keeping you safe. Even if you only used it once prior, it’s best to put that rope to less substantial purposes like for rappelling or TR and get a new one to manage the tough stuff.
– Super dirty
Ropes that are covered with grit, oil, sand, grease, or dirt of any kind will have a short life. These things penetrate the sheath and into the core, which makes it far less effective. Dirt will really just make it more annoying to handle rather than unsafe, but still, you don’t want to go into every new climb with a rope that feels filthy to the touch. Tips on caring for your rope can be found here.
– Ropes with burns
Whether by heat, friction, or major abrasions, ropes can become damaged. You’ll find stiffness in the sheath on these impacted areas. If your rope was kept near a source of heat (like a furnace, for example), it could have core damage, which most certainly impacts the integrity of your rope. Always feel around with your hands and use your eyes to look for any unusual signs on your rope like a singed, melted, or translucent appearance on the sheath.
As you can see, there are many things that can damage your soft gear like ropes aside from markers and Sharpies. But to keep things compliant, here are some recommendations on how you can mark these things without worry.
How to safely mark your soft gear besides Sharpies
You’ve got gear that needs marking and if you’re not willing to go against the advice of major safety administrations, then the following solutions will handle all your marking woes.
– Tape
- Duct Tape – It’s highly likely you have this around your house already. It doesn’t have any stretch to it so it can be difficult to make it tight on the rope. It also has more texture to it, so it won’t last as long and leaves behind a sticky residue. But it will work in a pinch.
- Automotive Pinstriping Tape – This one is durable and provides a low profile. It’s also stretchy, so it will give you a tight fit. You’ll need to do cutting compared to pre-cut options (listed below), but this will last for years over other types of tape.
- Hockey Tape – A really cheap option you can find is durable hockey tape. It can also double to protect your hands instead of climbing tape. In fact, plenty of climbers even favor snagging this from the hockey section simply because it performs better than climbing tape (which you don’t want to use on your ropes). However, hockey tape has a textured exterior, which isn’t always best for ropes.
- Electrical Tape – One of the best types of tape to use on your ropes is electrical tape. It stretches to give a great, tight fit. While it only comes in a limited array of colors, you can use two colors for a safer labeling experience. Just don’t use them right on top of each other. With frequent use, you can count on this to last you up to 4 years.
- Rack Tags – Trango makes these tags, which are great if you don’t want to cut and round out your tape. It comes in plenty of colors and is said to keep on keeping on for over 12 years. These won’t slide or fall off like electrical tape. The price is fairly comparable too.
- Vinyl Tape – The big brands have their own, but it seems an awful lot like electrical tape. It might be better to check out the other options rather than pay more for what’s essentially brand-labeled electrical tape.
- Identitape – This type of tape will last a good year to 3 years longer than duct tape or electrical tape. The downside is it gets brittle and is prone to flaking off. You can fix that by encasing it in clear tape, but then that takes more work.
- Scotchcal 220 series premium vinyl – Made for automotive purposes, this tape won’t peel away and will endure for several years over other types of tapes. It comes in lots of colors and even better, you won’t need to put layer upon layer. One will do it!
- Stickers and Packing Tape – If you like to put in a bit more work, you’ll get a customized look from this. It’s thin for a low profile and lasts as much as 3 years longer than other common tape types.
- Tough Tags – What’s cool about these is you can personalize them with your information. Great for the climbing gym in case you leave something behind, and some kind soul pays it forward by returning them.
– Enamels
- Nail Polish – For the ladies that have nail polish in their makeup stash or any guys that won’t get jacked by using up the last of her favorite polish, this is a great way to mark gear. It comes in snazzy colors, goes on low-profile, and even if you don’t have any of it at home, you can find it very easily and cheaply too. Paint in the crevasses of your gear and you’ll get long life out of this method (around 2 to 6 years).
- The Mark – As the official climbing marking solution, it contains no solvent, so it won’t go against the advice of the OSG or UIAA. This special epoxy is said to give the longest-lasting mark on gear of all. It’s ideal if you want to mark everything at once, providing coating for well over 200 pieces of gear. It’s not the best solution if you’re just getting into climbing since you need to mix 2 components to create the epoxy every time you want to mark something. When you’re starting out, you’re adding things piecemeal, which this method of marking isn’t ideal for.
- Spray Paint – So, it’s ugly, but you won’t have anyone trying to snatch it from you. It’s said to last longer than that nail polish and it just sprays on (which is really fun to apply). However, if you do go the spray paint route, spring for the good stuff. Cheap spray paint flakes off more quickly.
- Auto Laquer / Metal Compatible Paint – This option is like spray paint in that it comes in a variety of colors and you can spray it on. However, it’s more durable and tends to stay put. It still has that messy look to it that will customize your gear like a well-intentioned drawing from a small child though, which can deter theft if you don’t have a safe place to stow it when not in use.
– Permanent Alterations
A word of extreme caution before we head into permanent alterations. If you are new to climbing or you don’t know much about metals (or both!), please don’t try this at home. Any mistake you make can ruin the material and put your life at extreme risk. It’s not something you should take lightly as the damage you do could lead to serious injury or death.
- Cut the Tag – If you have a tagged item or something with a sling, it’s fairly safe, but there is a risk for cutting off too much and damaging your soft rock climbing gear beyond repair and beyond what makes it safe.
- Engraving/Stamping/Inscribing/Etching – In the olden days, climbers would practice the art of inscribing on their carabiners. Engraving doesn’t really damage your gear since it often gets little pock marks from rubbing into rocks. So, technically, if you only lightly engraved it, it should be fine. There are people that use dremels to keep it from getting deep. Again, this should be done with the most extreme of caution.
Longest Lasting Marking Methods
So, which one of these ways to mark your soft rock climbing gear lasts the longest? The Mark wins. But if that’s not feasible, those Rack Tags or Auto Pinstriping Tape will do. If you choose to go with metal enamels, spray paint trumps nail polish, which beats electrical tape.
The ones that provided the shortest length of time are also the cheapest. If you want to avoid having to mark things over again, it might be ideal to put a little more money into it. For example, the Rack Tags have great staying power, but The Mark lasts longer. The Mark isn’t worth it unless you have a large rack, though but it is said to be permanent.
As for tape or nail polish, most climbers will attest to nail polish outlasting the tape. Much of it does depend on the places you’re climbing, the climate you’re in, and where you’re making your markings. Of course, the permanent alterations would last even longer, but as they can compromise your gear, it’s not recommended.
Conclusion
Following guidelines set into place by safety authorities is always best, particularly when it comes to a sport like rock climbing. You can ignore their warnings and use a Sharpie, but there are plenty of other solutions that are safe and longer-lasting that won’t empty your wallet. Sometimes it takes a little trial and error to discover which of them works best for you.